
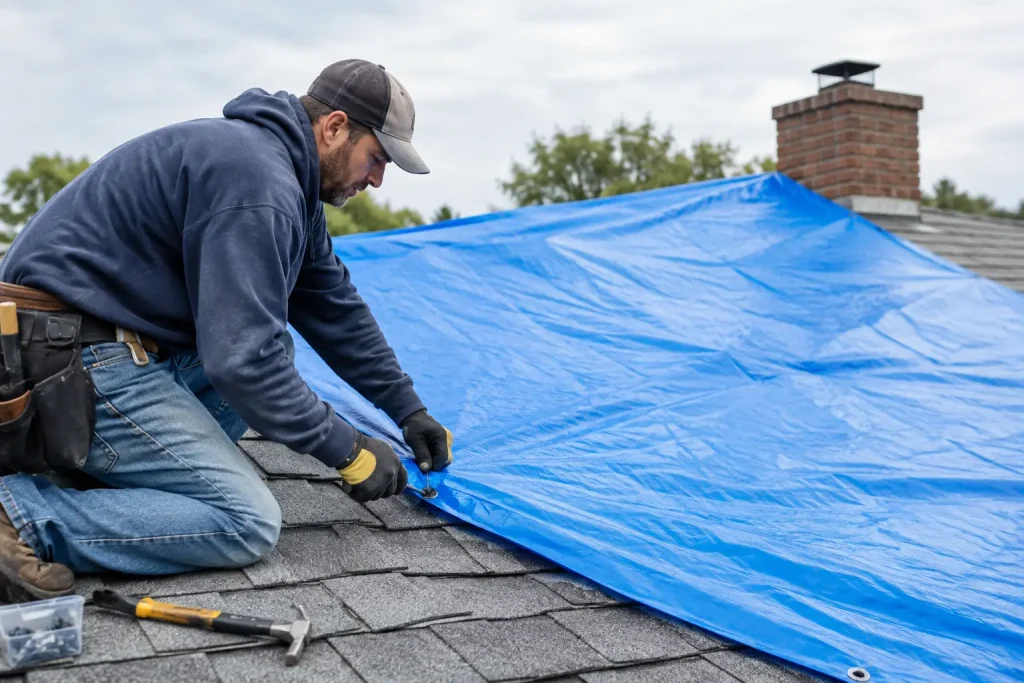
A ceiling stain can turn into soaked insulation, damaged drywall, and mold growth faster than most homeowners expect. Knowing how to tarp a leaking roof can help limit the damage during a storm or while you wait for a professional inspection. A tarp is a temporary weather barrier, not a roof repair, but installing one correctly can buy valuable time.
First, decide whether it is safe to tarp the roof
Do not climb onto a roof during active lightning, high winds, heavy rain, or icy conditions. Utah weather can change quickly, and wet shingles, metal panels, or membrane roofing are extremely slippery. A fall is never worth the risk of protecting property.
If the leak is active but conditions are unsafe, focus on controlling the water from inside. Place buckets under drips, move furniture and electronics out of the area, and poke a small hole in a bulging section of wet ceiling drywall to drain it into a bucket. This can prevent the ceiling from collapsing across a wider area.
It is also best to stay off the roof if you have a steep pitch, visible structural damage, loose power lines nearby, or no safe way to access the roof. In those situations, call a roofing contractor for emergency help once conditions allow. A tarp only works when it can be installed without creating a larger safety problem.
What you need to tarp a leaking roof
A heavy-duty polyethylene tarp is the right choice. Avoid thin plastic sheeting or lightweight tarps that can tear under wind, snow, or standing water. Choose a tarp large enough to cover the damaged area and extend well beyond it, especially uphill toward the roof ridge.
Gather these supplies before getting on the ladder:
- A heavy-duty tarp large enough to overlap the damaged area by at least 4 feet
- 2-by-4 boards or furring strips to secure the tarp edges
- Galvanized screws or roofing nails and a hammer or drill
- A ladder, work gloves, non-slip shoes, and eye protection
- A utility knife and measuring tape
- A helper to steady the ladder and hand up materials
If possible, use screws rather than nails for the wood strips. Screws generally hold better in wind and may be easier for a roofer to remove during the permanent repair. Keep in mind that any fastener driven through shingles can create another potential entry point for water, so use only what is needed to secure the tarp.
How to tarp a leaking roof safely
Find the likely source, not just the indoor drip
Water can travel along roof decking, rafters, plumbing vents, or insulation before it reaches your ceiling. The leak inside may be several feet away from the actual opening on the roof. Look for missing or lifted shingles, cracked flashing around vents or chimneys, storm-damaged areas, exposed roof decking, or debris that has damaged the roof surface.
If you cannot identify the exact opening, cover the suspected area and a wide section around it. A tarp that is too small is one of the most common reasons temporary roof protection fails.
Cover from the ridge down
The upper edge of the tarp should run over the roof ridge whenever possible. This matters because water flows downhill. If the tarp begins below the ridge, rain can run under its top edge and continue into the damaged area.
Roll one end of the tarp around a 2-by-4 board and secure the board on the opposite side of the ridge, where it will not interfere with the damaged section. This anchors the tarp and helps keep wind from lifting it. Do not simply lay a tarp across the roof and weigh it down with bricks, rocks, or other loose materials. Those items can slide, damage shingles, or become dangerous in high wind.
Unroll the tarp down the slope so it lies flat over the damaged section. Pull it snug enough to shed water, but do not stretch it so tightly that it tears at the grommets or pulls against sharp edges.
Secure the sides and bottom without trapping water
Once the tarp is positioned, attach 2-by-4 boards along the side edges by rolling the tarp around each board one or two times. Fasten the boards carefully into the roof decking or along stable roof edges where appropriate. The goal is to prevent wind from getting beneath the tarp.
Secure the bottom edge last. Let the tarp extend beyond the damaged area and, when practical, over the eave so water drains away from the roof rather than underneath the tarp. Avoid creating folds, low spots, or pockets where rainwater can collect. Standing water adds weight and can pull the tarp loose.
On a low-slope roof, water drainage requires extra attention. The tarp must direct water toward the existing drainage path without blocking scuppers, gutters, or drains. Commercial roofs can have concealed damage and drainage details that are not obvious from the surface, so property owners should strongly consider having a qualified roofing professional handle temporary protection.
Avoid these common tarp mistakes
A tarp is only useful if water stays on top of it and wind stays out from underneath it. Covering only the visible hole, leaving the uphill edge unsecured, or using too few fasteners can allow water to keep entering the roof system.
Do not nail directly through the center of the tarp unless there is no other option. Every puncture is a possible leak point, especially as the tarp moves in the wind. Wrapping tarp edges around wood strips spreads the holding force and gives the tarp a better chance of surviving rough weather.
It is also wise to avoid walking repeatedly across damaged shingles. Hail, wind, and age can weaken shingles and underlayment even when the damage is difficult to see. Extra foot traffic may break brittle materials or worsen a soft spot in the decking.
Finally, do not assume a tarp means the problem can wait indefinitely. Sunlight degrades plastic, wind loosens fasteners, and snow loads can stress a temporary cover. Check the tarp from the ground after each storm if it is safe to do so, and schedule a repair as soon as possible.
Protect the inside of your home while the tarp is up
The roof is only one part of preventing further damage. Dry the affected area as quickly as possible. Use fans and dehumidifiers after the leak is stopped, but do not run electrical equipment near standing water or wet wiring. If water reached light fixtures, outlets, or your electrical panel, turn off power to the affected area and contact an electrician.
Take clear photos of the roof damage, interior water stains, wet belongings, and the tarp installation before cleaning up. These records can be helpful if the leak followed wind, hail, or another covered storm event. Save receipts for emergency materials and any professional mitigation work as well.
If insulation is saturated or drywall is soft, sagging, or crumbly, it may need to be removed and replaced. Drying visible surfaces alone does not always solve moisture trapped behind walls or above ceilings.
When to call a roofing professional
A tarp is appropriate for a small, accessible area when weather is calm and the roof can be reached safely. It is not the right answer for widespread hail damage, a large tree impact, missing sections of decking, repeated leaks, or damage around complex flashing and skylights.
A professional inspection can determine whether the issue is a repairable flashing failure, a damaged shingle area, compromised underlayment, or a larger roof-system problem. For Utah homeowners, that distinction can matter after heavy wind, hail, snow, and freeze-thaw cycles. Big West Roofing can inspect the roof, explain the condition clearly, and help you understand the practical repair or replacement options.
Your immediate job is simple: keep people safe, keep water away from your home’s interior, and get a durable repair planned before the next weather event tests that temporary tarp.